Heya everyone and, as usual, a big welcome back to SQL
Something. :-)
Today’s post is going to illustrate how to set up Email
Notifications for SQL Server jobs, specifically for a simple backup job in this
case. A friend of mine indicated that they didn’t know how and that inspired
this week’s post.
It’s going to be divided up into three main parts:
- Setting up the Email Account(s) to Send Notifications
- Setting up the Email Account(s) to Receive Notifications
- Setting up the Job with Email Alerts
This blog post is also going to look like it was hit by a
picture nuke.
Setting up the Email Account(s) to Send Notifications
Firstly open up SQL Server Management Studio (I’m using SQL
Server 2008 for this demo). Next go down
to the ‘Management’ tab and expand it. You should see a section labelled “Database
Mail” as shown in Fig. 1.
Right click and choose “Configure Database Email”. On the
Select Configuration Task screen choose “Set up Database Mail…” (you may get a
prompt saying email is not enabled and ask you if you wish to enable it; say
yes). Fill out the Profile name and Description (ALWAYS fill out descriptions;
it’s helpful for future references). Under “SMTP Accounts” click ‘Add’, then
fill out the fields (you may need the assistance of your friendly Network Tech
for this). You should have something like Fig. 2 when you’re done. Click Next.
Set up your Profile Security. Leave as Default. Click Next.
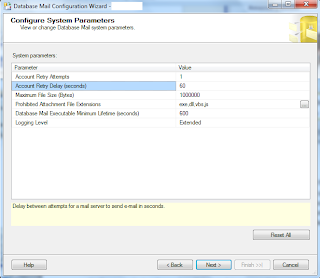
Configure your System Parameters. Click on each to get a
small description and adjust to suit. Click Next.
Finally click Finish. The email account should be set up for outgoing mail!
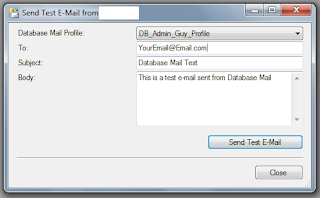
You can do a quick test to ensure that everything is set up
correctly by right clicking “Database Mail” under the Management tab and
choosing “Send Test Email”
Setting up the Email Account(s) to Receive Notifications
Now that we have set up the outgoing account, let us set up
accounts to receive the emails.
To do this we need to set up ‘Operators’:
Go to the “SQL Server Agent” tab and expand it.
Right Click and choose “New Operator”
Fill out the fields (in this case just the Operator Name and
Email Address).
Now you have a receiving email address!
Setting up the Job with Email Alerts
Now let’s create a simple backup job. Go back to the Management
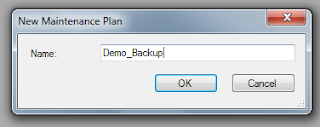
tab, and right click “Maintenance Plans” and choose “New Maintenance Plan”.
Name it what you will.
You should now see a blank Design page.
Open up your toolbox (should be on your left hand side) and
drag a “Back Up Database Task” item to the blank section.
Double click the newly created Back Up item (or
alternatively, right click and select “Edit”) and you should be presented with
many options to tailor a backup to your needs.
Select the database(s) that you wish to back up, set the
location (normally I also select the “Create a sub- directory…” option). Click
Ok. Now you have a Backup Plan!
Next we will add the focus of the tutorial: The Email
Notifications! Yes! That is PLURAL!
We will be adding two notifications: one if the backup job
succeeds and one if it fails. Pretty neat? I think so.
Remember that operator we made? Now we’ll use him. Go back
to your toolbox and drag a “Notify Operator Task” item to your canvas.
Double click (or right click and “Edit”) your new task item
and edit it to display your success email.
 |
| Fig. 12 |
Repeat the last 2 steps for your failure message so that you
have a canvas looking like FIG. 13.
Now THIS IS IMPORTANT. We must connect the two notifications
to the actual backup action and indicate which one is for success and which one
is for failure.
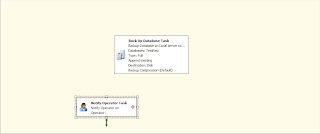
You will see a little green arrow
coming out from the base of the backup task. Drag that arrow until it connects
with the Success notification as shown in Fig. 14.
Click on the backup task again and another green arrow will
appear. Repeat the above process.
As is, the Backup plan will send out two emails upon
success. We DO NOT want this as we want one to indicate failure. Right click
the green arrow that is connected to the failure notification and choose “Failure”.
Click the save button. We have now created the backup plan! :-)
Now we must create the job to run it.
Expand SQL Server Agent and right click jobs. Select “New Job…”.
Go to steps and select “New…”. Name the step and choose “SQL
Server Integration Services Package” as type. Enter your server name and under “Package”
at the bottom, browse to the Maintenance Plan folder and choose your backup
plan. Click OK.
Click OK, then click OK on the main form and we’re finally
done!
Now your backup job will run at the specified time and an
email will be sent at the end whether it succeeded or not.
This is a relatively simple thing to set up but as you can
see it takes a few steps to do so. Hope it helps somebody out there. :-)
DISCLAIMER: As stated, I’m not an expert so please, PLEASE feel free to politely correct or comment as you see fit. Your feedback is always welcomed. :-)
DISCLAIMER: As stated, I’m not an expert so please, PLEASE feel free to politely correct or comment as you see fit. Your feedback is always welcomed. :-)


No comments:
Post a Comment